Sage 50 Bulk Email Payroll Paystubs and Earning Statements.
Preinstall checklist and settings.
This page provides information needed to set up the DSStudio Sage 50 Bulk Email Payroll Paystubs report or Payroll Earning Statement.
Please make sure you have all the information on the checklist completed prior to running the report.
Check List
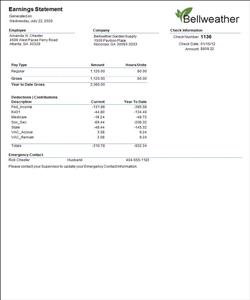
 Company Logo. You have the ability to add your Company Logo to the Paystubs. This is optional. If you are planning on adding a logo please make sure you know the location of your logo image file. You may also have to adjust the size so it looks clear on the emailed stubs. Show Me
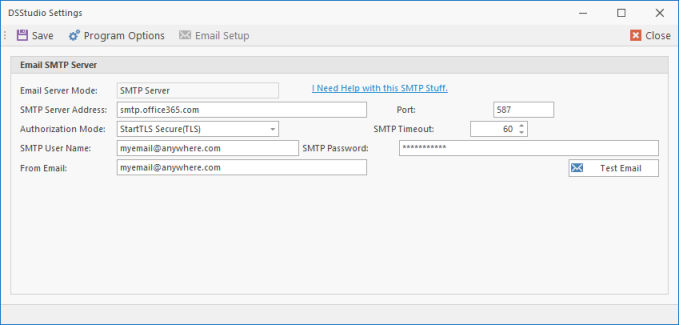
 Your email SMTP settings. This is the connection to the SMTP server that sends your Sage 50 Payroll Stubs emails. If you are unaware of any of these settings please consult your IT Department. You will need to know the following settings from the screen below. Show me
 Passwords for employees. If you are planning on protecting the paystubs with a password, then you need to assign a password to each employee.
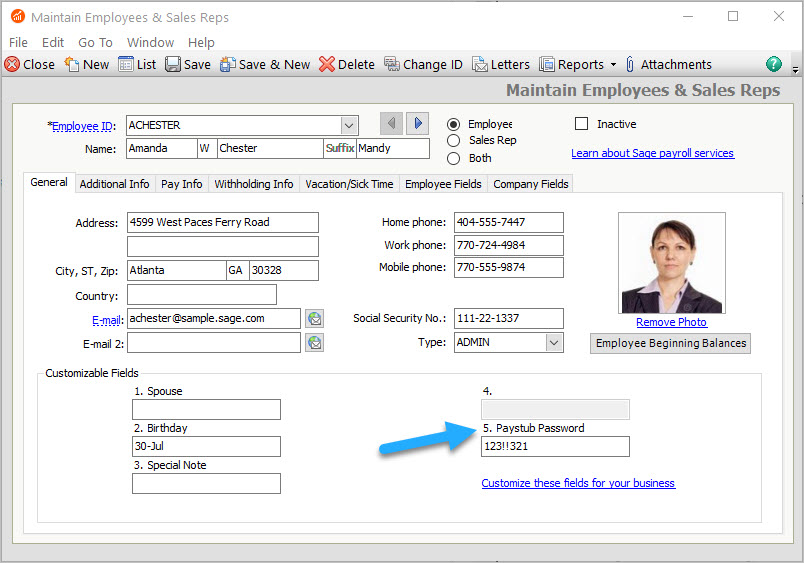
Our report uses one of 5 custom fields inside Sage 50 Maintain Employees. Set up one of your custom fields for passwords. You will then need to enter each employee’s custom field password. Show me
Setting the password custom field.
Once you have all your employee’s custom field passwords set up in Maintain Employee’s, you need to assign which custom field number (1-5) you used in the Email Paystub Report.
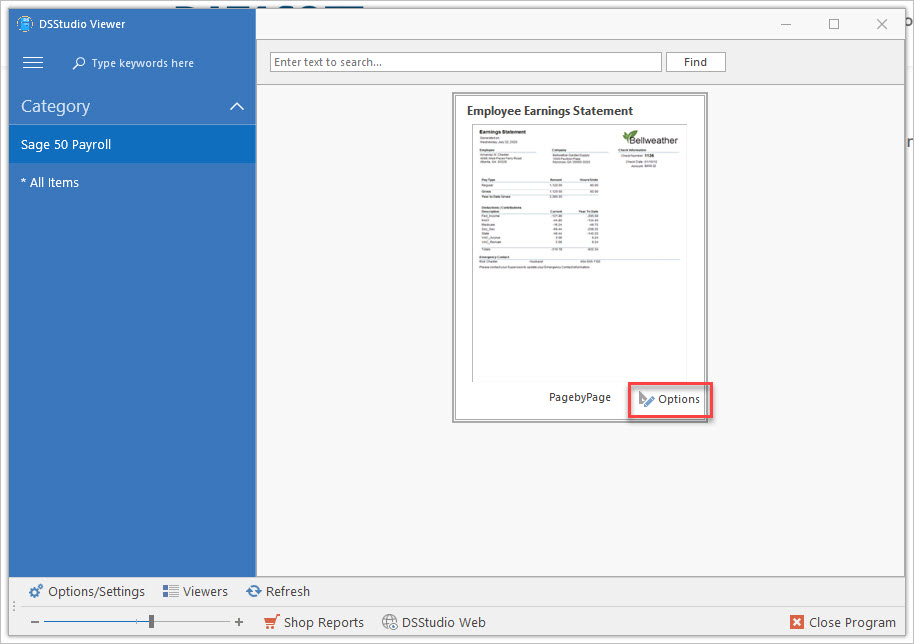
From the DSStudio Viewer main screen click the options button on the report.
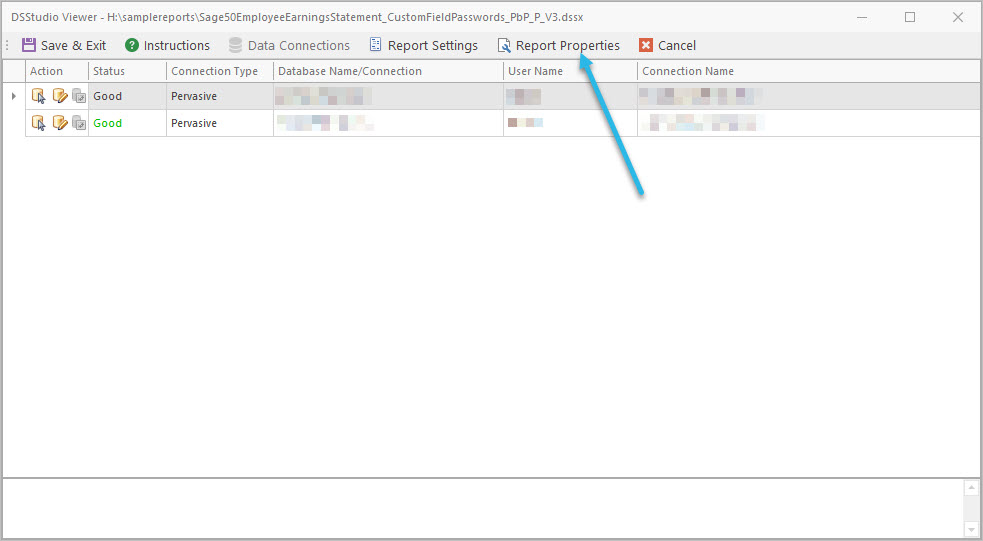
Next select Report Properties from the top menu bar.
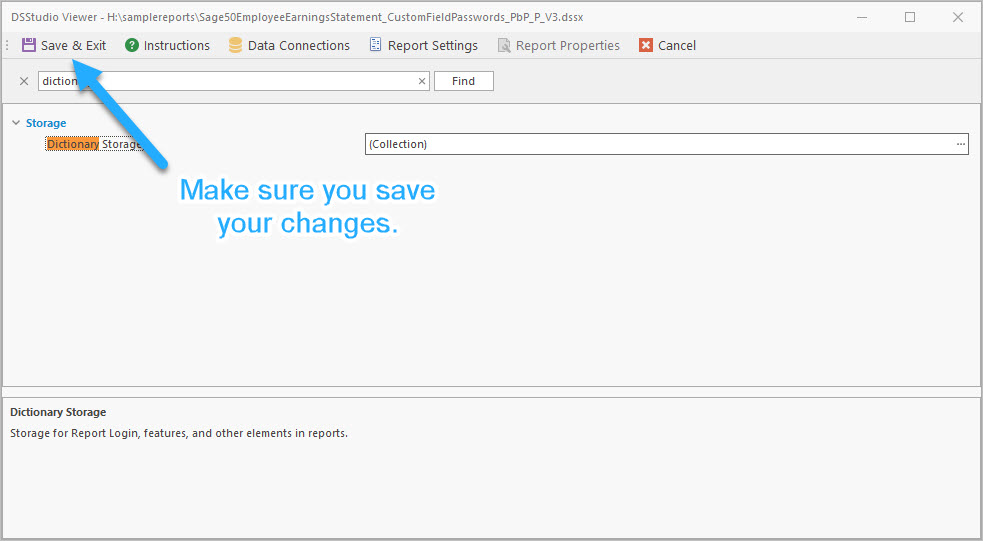
Type in “dictionary” in the find box. Click the down arrow on the Storage Property. Click the … on the Dictionary Storage Collection.
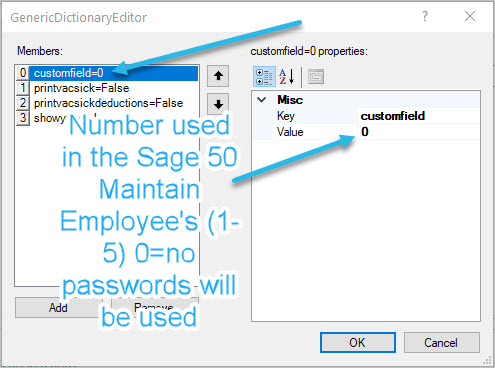
Update the customfield member to the number you assigned in Sage 50 Maintain Employees. This number can be 1 = 5. If you don’t want to use passwords on the paystub then set the value to 0 (zero).
Make sure you save your changes.
Set up the SMTP connection.
In order for DSStudio to send emails, it has to have a connection to an SMTP Server. You will need your server address, security settings, user name, and password. This information can be supplied to you from your IT Administrator. The settings are located in the Program Settings area.
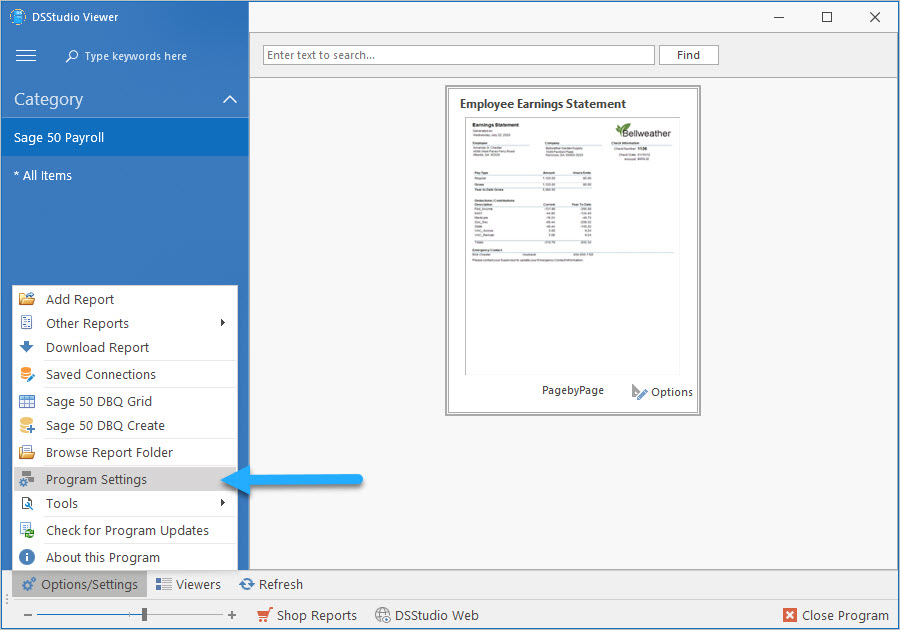
From the DSStudio Viewer Main Screen select Options/Settings in the bottom left corner.
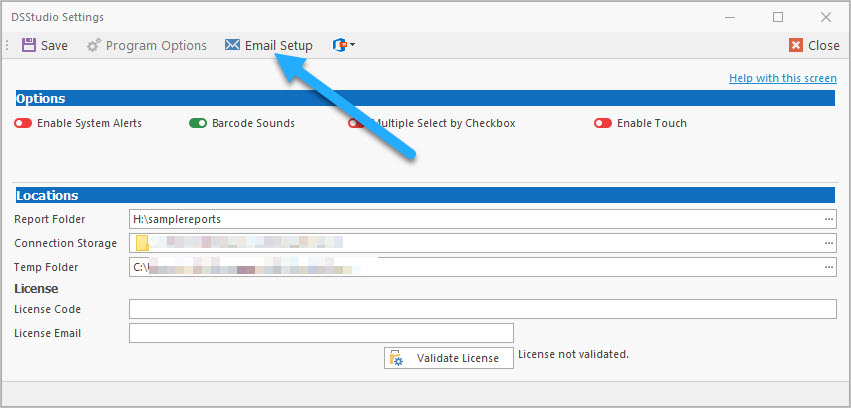
Click on Email Setup and enter your SMTP connection settings. Click Save when completed.
Changing the Logo.
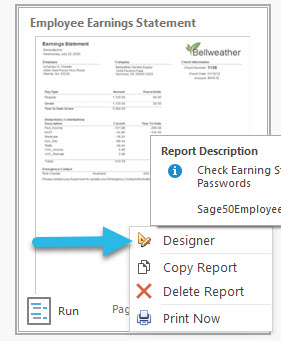
From the DSStudio Viewer main screen, right click the Employee Earning Statement Report. Then select Disigner.
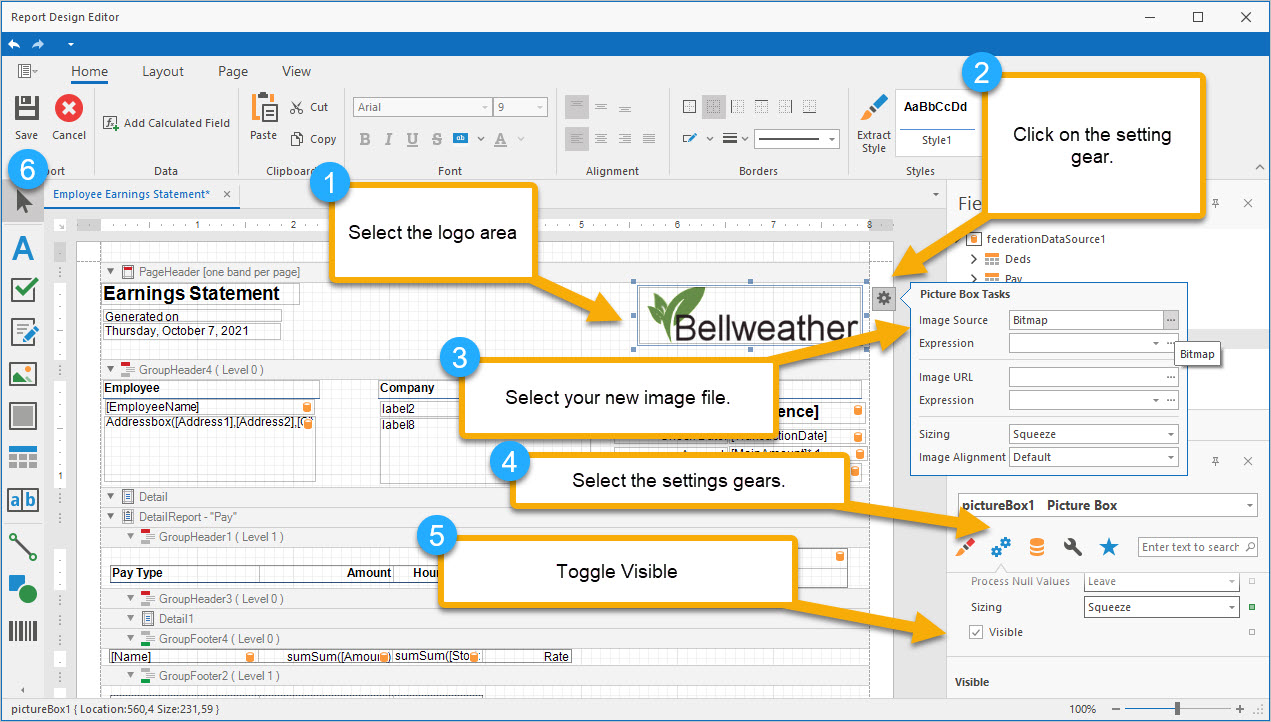
With the designer open perform the following:
1. Select the logo area.
2. Click the gear icon. This will show the logo quick options.
3. Click on the Image Source … and navigate to the logo image file you want.
Optional – You can hide the logo if you wish by setting its Visible property.
4. Click on the double gears.
5. Toggle the Visible property.
6. When finished with your changes make sure you click save. If this is the original report you will not be able to override the file. You will need to give it a new file name to save. This protects the original report from changes. You can move your original report into a different folder so it will not show up in the viewer anymore.
