DataSoft Blog
What it is
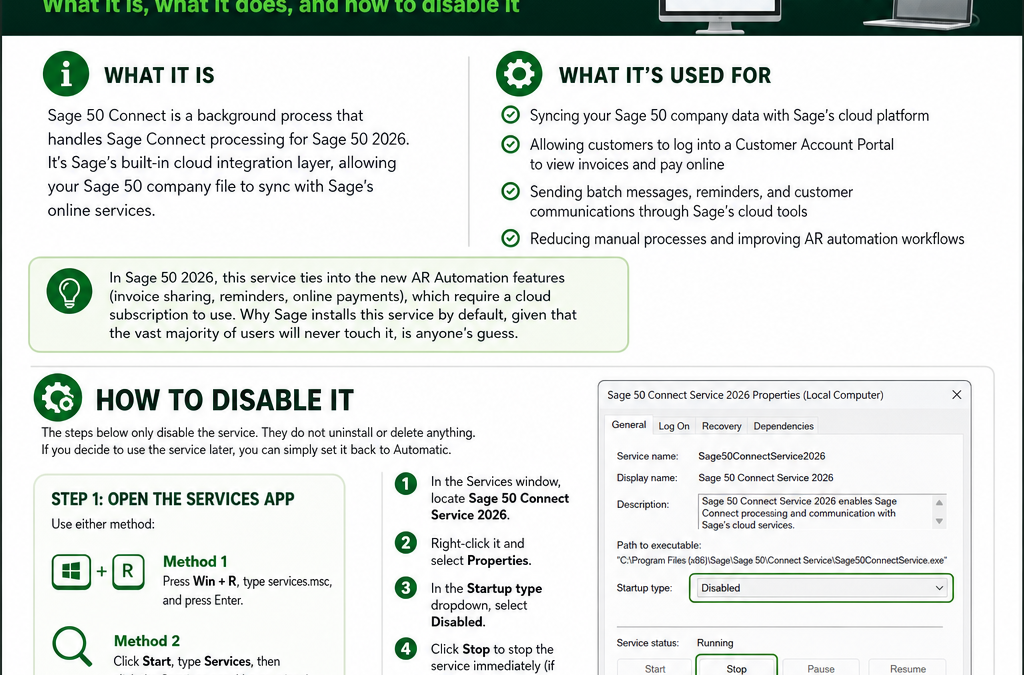
Sage 50 Connect is a background process that handles Sage Connect processing for Sage 50 2026. It's Sage's built-in cloud integration layer, allowing your Sage 50 company file to sync with Sage's online services.
What it's used for
- Syncing your Sage 50 company data with Sage's cloud platform
- Allowing customers to log into a Customer Account Portal to view invoices and pay online
- Sending batch messages, reminders, and customer communications through Sage's cloud tools
- Reducing manual processes and improving AR automation workflows
In Sage 50 2026, this service ties into the new AR Automation features (invoice sharing, reminders, online payments), which require a cloud subscription to use.
Why Sage installs this service by default, given that the vast majority of users will never touch it, is anyone's guess.
Why you may want to turn it off
Even if you have no plans to use the AR Automation or cloud features, this service runs in the background regardless. For most users, that means:
- Unnecessary processing of data that has nothing to do with how they actually use Sage 50
- Occasional conflicts with user security roles
- Slower company file opening times
If you're not using the cloud-based AR features, there's little reason to let this service run.
How to disable it
The steps below only disable the service. They do not uninstall or delete anything. If you decide to use the service later, you can simply set it back to Automatic.
- Open the Services app using either method:
- Method 1: Press
Win + R, type services.msc, and press Enter.
- Method 2: Click Start, type Services, then click the Services app (the gear icon).
- In the Services window, locate Sage 50 Connect Service 2026.
- Right-click it and select Properties.
- In the Startup type dropdown, select Disabled.
- Click Stop to stop the service immediately (if it's currently running).
- Click Apply, then OK.
That's it. The service is now disabled and won't start back up the next time you reboot. If you ever need it again, just repeat these steps and set Startup type back to Automatic.
DataSoft Blog, Sage 50 Tips
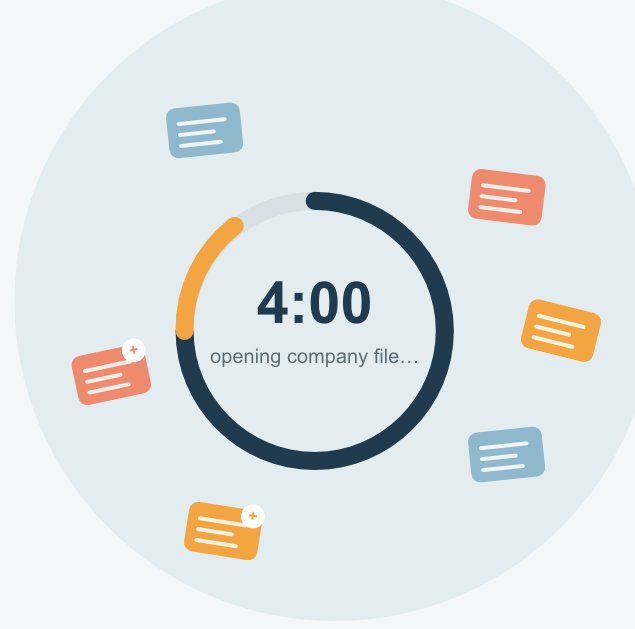
If you've recently updated to Sage 50 2026 and noticed that opening your company file now takes significantly longer — sometimes up to four minutes, you're not imagining it, and you're not alone.
What's Going On
With the 2026 release, Sage introduced several new background services that run as part of Sage 50. While these services are designed to add new functionality, they're also creating a large number of additional data records behind the scenes. Over time, these extra records build up in your company dataset, and that buildup is what's slowing things down when you open your company file.
The good news: this isn't a sign that anything is wrong with your business data. It's an issue with how the dataset itself has grown, and it can be fixed.
How to Fix It
To get your company file back to opening quickly, your dataset needs to be cleaned up — specifically, those extra records need to be safely identified and removed without affecting your actual business data.
Here's how the process works:
- Submit your dataset to DataSoft's Data Recovery Service.
- We repair your database, removing the extra records that are causing the slowdown, while keeping your company data fully intact.
- We remotely connect to your computer to configure your system so this issue doesn't come back.
Once this is complete, your company file should open at normal speed again, no more waiting around for several minutes just to get started with your day.
Ready to Get Started?
If you're experiencing slow company load times in Sage 50 2026, reach out to our team or submit your dataset for repair.
DataSoft Blog
The Daily AP Habit That Saves Time, Prevents Mistakes, and Keeps Cash Flow Predictable
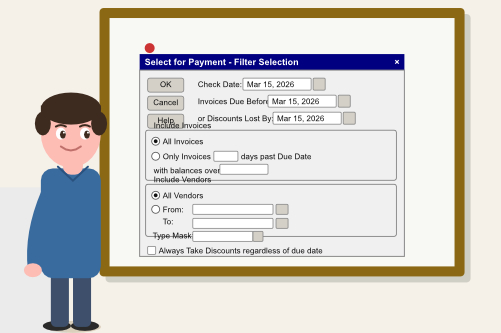
The Select for Payment screen is one of the most misunderstood and underused features in Sage 50 US. Many users treat it like a simple “pay bills” list, but when you use it properly, it becomes a powerful cash flow control center for your accounts payable.
In this article, we’ll walk through how to use the Select for Payment screen in a practical, everyday way — just real workflow tips you can use today.
What the Select For Payment Screen Actually Does
The Select for Payment screen is more than a list of unpaid bills. It’s a decision screen that helps you:
- Prioritize payments based on due dates and cash availability
- Avoid late fees and vendor relationship issues
- Manage cash flow by controlling what gets paid and when
- Prevent duplicate or accidental payments by reviewing everything in one place
Think of it as your daily AP control panel inside Sage 50.
1. Start With the Right Filters
Most users skip the filters, and that’s exactly why the Select for Payment screen can feel overwhelming. A few smart filters can turn a long, messy list into a clean, actionable queue.
Useful filters include:
- Due Date – Show only invoices due today, this week, or within a specific date range.
- Discount Date – Focus on invoices that qualify for early payment discounts.
- Vendor Type – Separate utilities, inventory vendors, contractors, and other categories.
- Payment Method – Filter by ACH, check, or credit card to match your payment run.
Once you apply filters, the screen becomes much easier to work with, and you can focus on what truly needs attention today.
2. Understand the “Pay” Checkbox
The Pay checkbox is where many mistakes happen.
- Checking Pay means “include this invoice in the current payment run.”
- Leaving it unchecked keeps the invoice open but excludes it from this batch of payments.
If you see invoices automatically checked, Sage 50 is usually telling you they are due or discount eligible based on your settings. It’s still worth reviewing them, but it’s a helpful starting point.
3. Use the “Pay Amount” Column Wisely
The Pay Amount column is one of the most powerful parts of the Select for Payment screen, especially for cash flow management.
You can use it to:
- Short-pay an invoice if you’re disputing part of the amount.
- Split payments across multiple weeks instead of paying the full balance at once.
- Pay only the discounted amount when early payment terms apply.
- Pay only the past-due portion while leaving future-dated invoices for later.
This is how many AP teams keep vendors happy while still protecting cash flow.
4. Select an Invoice and See Its Details
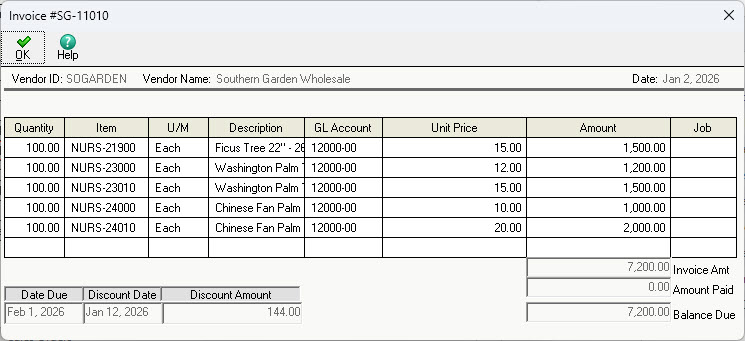
If you need to see what an invoice is for, click on it in the grid and select the “Detail” button at the top of the screen.
You will not be able to change any details of the transaction — it’s for review purposes only.
5. Watch the Running Total at the Bottom
At the bottom of the Select for Payment screen, Sage 50 shows a running total of the payments you’ve selected. This is your real-time cash flow guardrail.
As you check and uncheck invoices:
- The total updates instantly.
- You can stay under a daily or weekly cash limit.
- You reduce the risk of overdrafts or surprise cash shortages.
This is a big advantage over paying invoices one by one without seeing the full picture.
6. Review the Remittance Before Finalizing
Before you finalize the payment run, take a brief moment to review the remittance or payment list. This is your last chance to catch:
- Incorrect amounts
- Wrong vendors
- Old invoices that shouldn’t be paid yet
- Discounts that weren’t applied correctly
A quick 30-second review can save hours of cleanup later.
7. Use “Print” to Finalize Your Payments
Once you’ve reviewed your list, adjusted amounts, and confirmed your total, use the “Print” button at the top of the screen.
You may notice the down arrow next to the “Print” button. This gives you two more options:
- Preview the checks
- Print a report
If you don’t physically send out checks and use some form of ACH, you can print the checks to a PDF file.
Final Takeaway
The Select for Payment screen in Sage 50 US is more than just a list of bills. When you use it properly, it becomes a daily AP control panel that helps you:
- Pay the right vendors
- At the right time
- For the right amounts
- With full awareness of your cash flow
If your accounts payable process feels stressful or unpredictable, building a daily habit around the Select for Payment screen is one of the easiest ways to bring order and confidence back into your Sage 50 workflow.
DataSoft Blog
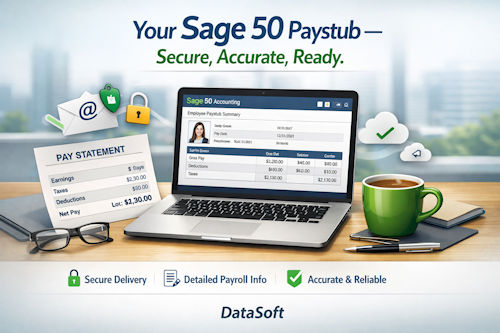
Bulk Email Paystubs for Sage 50: Automate and Simplify Payroll Delivery
Delivering paystubs shouldn’t slow down payroll day. If your team is still printing, folding, and manually emailing paystubs, you’re losing valuable time and increasing the risk of errors. That’s why DataSoft created Bulk Email Paystubs for Sage 50 — a fast, secure, and automated way to generate and email paystubs directly from your Sage 50 company data.
This tool eliminates manual steps, reduces payroll stress, and ensures every employee receives their paystub quickly and securely.
Why Businesses Choose Bulk Email Paystubs for Sage 50
1. Instant PDF Paystub Generation
The software pulls live payroll data directly from your Sage 50 company file and automatically generates secure PDF paystubs — no exporting, no merging, and no manual editing required.
2. Email Hundreds of Paystubs in Minutes
Select your payroll date, load the checks, customize your message, and click Send. Every employee receives a private, secure PDF paystub in their inbox.
3. No Syncing or Third Party Data Issues
Because the tool connects directly to your Sage 50 database, you avoid common syncing problems such as:
- Out of date employee information
- Incorrect payroll data
- Third party integration failures
Your paystubs always match the exact data inside Sage 50.
4. Fully Customizable Paystub Layout (Professional Edition)
Need branded paystubs? Want to adjust fields or formatting? The Professional Edition gives you full control over the paystub template for a polished, professional look.
How the Bulk Email Paystubs Tool Works
- Launch the Bulk Email Paystubs program.
- Select your Sage 50 company template.
- Choose the payroll check date.
- Click Load Checks to pull in all employees paid on that date.
- Customize your email subject and message.
- Click Send Email to deliver all paystubs instantly.
What used to take hours now takes minutes.
Standard vs. Professional Edition
| Feature |
Standard |
Professional |
| Unlimited employees |
✓ |
✓ |
| Unlimited Sage 50 companies |
✓ |
✓ |
| Automated PDF generation |
✓ |
✓ |
| Custom email messaging |
✓ |
✓ |
| Editable paystub layout |
— |
✓ |
Both editions are licensed per workstation and include updates and email support.
Who Benefits Most From Bulk Email Paystubs?
- Accountants managing payroll for multiple clients
- Growing companies looking to eliminate manual paystub distribution
- HR teams needing a secure, consistent delivery method
- Remote and hybrid workforces requiring digital paystub access
- Any Sage 50 user who values accuracy, speed, and compliance
If you process payroll more than once a month, this tool pays for itself almost immediately.
A Faster, More Secure Payroll Workflow
Employees receive their paystubs faster. HR teams save hours of manual work. Your business gains a more secure, compliant, and efficient payroll process.
Bulk Email Paystubs for Sage 50 isn’t just a convenience — it’s a modern payroll essential.
More Information
DataSoft Blog
Smart Shipping Starts on the Inside of the Box
If you ship orders with multiple small items in a single box, you already know the pain: a missing part discovered by a frustrated customer, a warehouse worker trying to remember what was packed an hour ago, a packing slip lost somewhere between the bench and the shipping dock. It happens. But it does not have to.
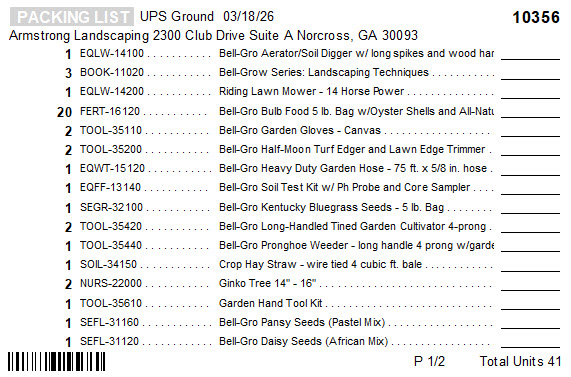
Articles offers a packing label report as a separate download from the report catalog. Once installed, it prints a 4×6 thermal label — the industry standard size — that goes on the inside flap of the box before it is sealed.
Thermal Labels Are Cheap
You do not need expensive equipment to use this. A basic thermal label printer runs around $40, and a pack of 500 labels costs about $5. No ink, no toner, no maintenance. Thermal printers are fast, reliable, and quiet enough to sit on any packing bench without getting in the way.
The 4×6 label size is the same standard used by shipping carriers like UPS and FedEx, so if you already have a thermal printer for shipping labels, you may already have everything you need.
The Label Goes on the Inside Flap
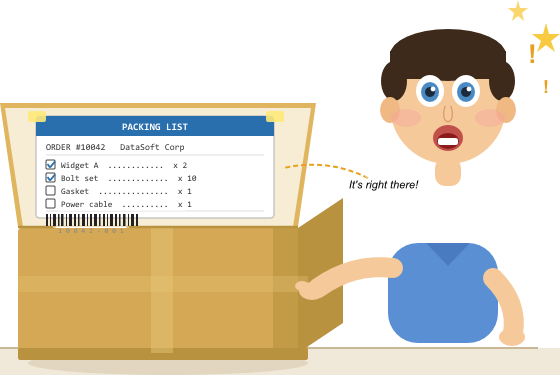
Most packing slips travel on the outside of a box, where they can be damaged, lost, or left behind on the bench. This label is designed to go on the inside of the top flap or any type of container you use. The customer opens the box and finds it immediately. Your warehouse staff uses it as a live checklist while packing.
Because it travels sealed inside the box, it cannot fall off in transit, cannot be mislaid in the warehouse, and arrives with the order every single time.
A Checklist That Gets Used
Each line item on the label has a printed checkbox or quantity shipped area. As each item goes into the box, the packer checks it off. This is not just good practice — it creates a physical record that the order was verified before sealing. No more relying on memory. No more half-packed boxes going out the door because someone was interrupted mid-pack.
The label is especially useful when an order contains many small pieces. Like spare parts, accessories, consumables, or components. These are exactly the items easiest to miss and hardest for a customer to notice are missing until they actually need them.
The Barcode Closes the Loop
At the bottom of the label, Articles prints a barcode tied to the order. When the packer is done and the box is ready to seal, they scan the barcode with a standard warehouse scanner. That single scan updates your accounting system, marking the order as shipped and automatically recording the timestamp.
No double entry. No separate terminal. No forgetting to mark an order dispatched at the end of a busy day. The barcode value can be the order number, invoice number, or any reference your accounting system recognizes.
Why It Cuts Down on Shipping Errors
Shipping errors tend to cluster around the same causes: items missed during packing, orders mixed up on a busy bench, and no real verification step before sealing. The packing label addresses all three directly. The checklist keeps the packer focused. The inside-flap placement means it travels with the order. The barcode scan confirms dispatch without any manual follow-up.
Customers benefit too. When they open the box, the label is right there as a packing list. They can verify their order against it immediately, which cuts down on unnecessary support contacts and disputes over missing items.
Getting It
The packing label report is not included in Articles by default. It is available as a separate download from the Articles report catalog inside the application. Install it once and it works like any other Articles report — pull up the order, run the label, print. It fits into the existing workflow without any additional software or configuration beyond the first setup.
