
Resolving “Unable to Connect to Database” After Upgrading to Sage 50 2026
If you upgraded to Sage 50 2026 and your DSStudio reports display an “Unable to Connect to Database” error, the issue is typically caused by one of two changes introduced during the upgrade. Follow the steps below to restore connectivity.
1. Verify That Sage 50 Data Access for ODBC Is Enabled
Sage 50 updates may disable ODBC Data Access, which prevents DSStudio from connecting.
Follow the instructions on this page to re‑enable ODBC access:
https://dscorp.com/docs/sage-50-helps/dsstudio-with-sage-50/unable-to-connect-to-databae/
If the error persists after enabling ODBC access, continue to the next section.
2. Confirm the Correct DBQ Name (Alias)
Sage 50 2026 may update or rename the DBQ Name, which is the alias DSStudio uses to locate your company’s database.
What is a DBQ Name?
A DBQ Name is an alias that points to the physical Data Path of your Sage 50 company folder.
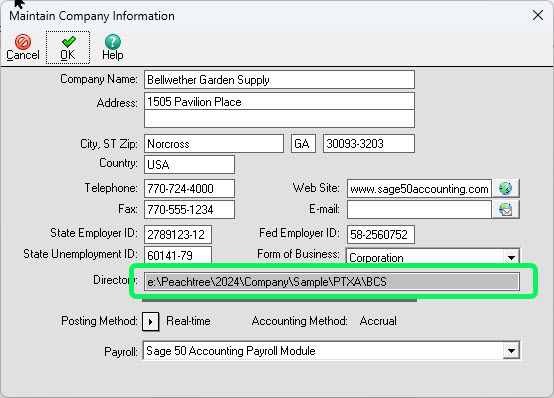
You will need to know your Sage 50 database directory. You can find this Directory by opening Sage 50, Selecting Maintain from the top menu then selecting Company Information…
How to Locate the Correct DBQ Name
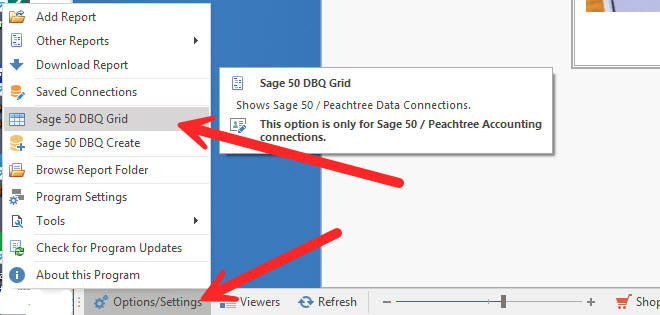
- Open DSStudio and go to Options / Settings on the bottom left corner.
- Select the Sage 50 DBQ Grid option.
- If the Sage 50 data is stored on the same computer where DSStudio is running, enter localhost as the server name.
- “Localhost” refers to the computer you are currently using.
- In the grid, locate the Data Path column and identify the correct company data folder (Directory).
- You can confirm the correct Data Path by using the same path inside the Maintain → Company Information… above.
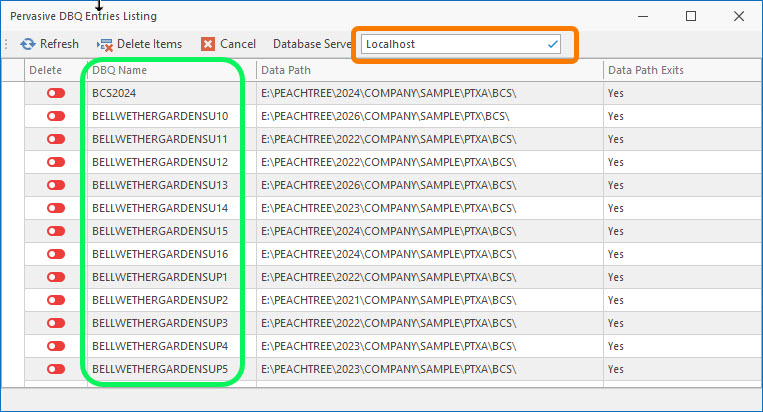
Copy the DBQ Name associated with the correct Data Path.
Close the Pervasive DBQ Entries Listing window.
3. Update the Report’s Database Connection in DSStudio
Once you have the correct DBQ Name:
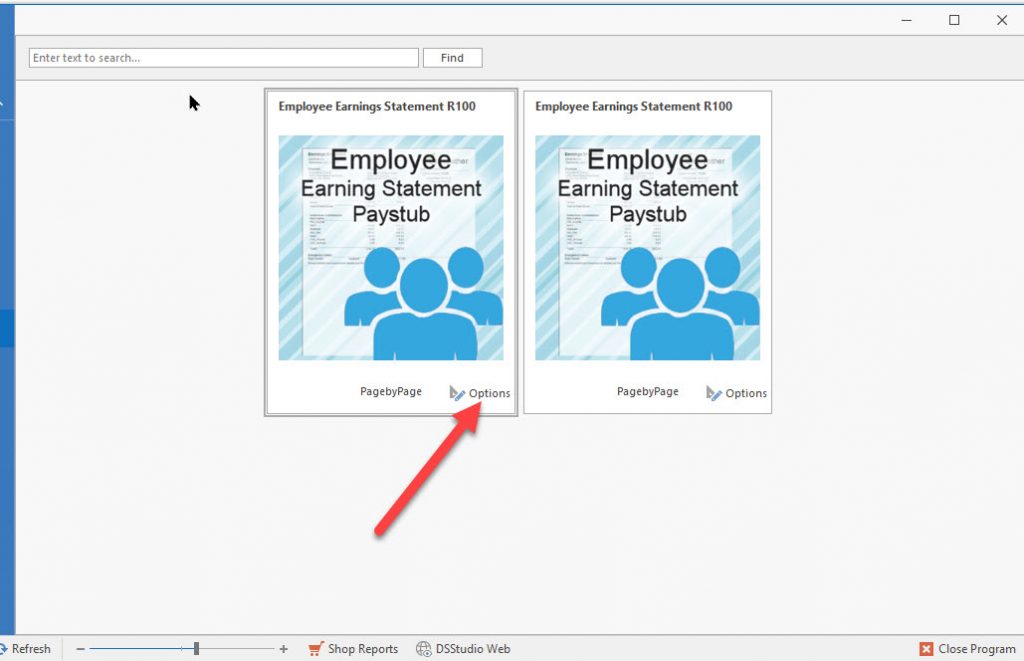
- Open the report that is failing to connect.
- Click Options in the lower‑right corner of the report window.
3. In the Database Connections list, click the Edit Connection icon in the Action column.

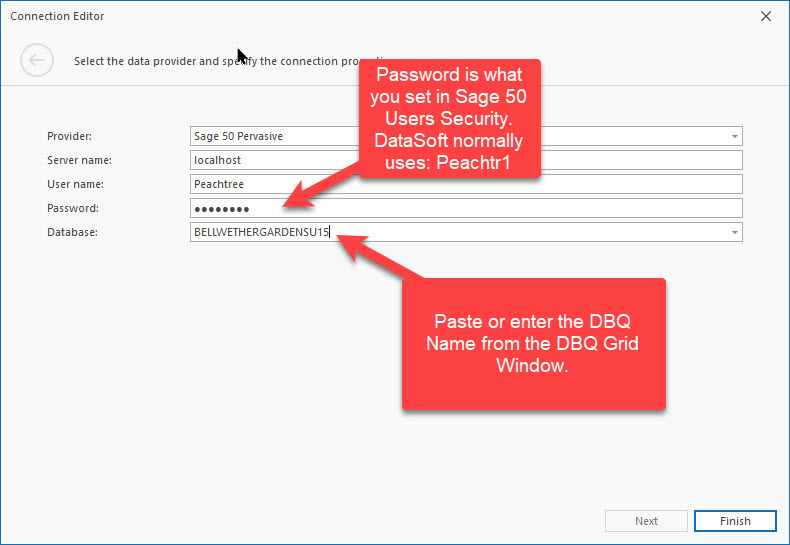
- Screen Settings:
- Servername: Use your server name, or localhost if the data is on this computer.
- User Name:
Peachtree - Password: Enter the password you configured in Sage 50 User Security.
- Database: Paste or type the DBQ Name you identified earlier.
- Click Finish to save the connection.